


Alien Space Realflow
Starting things off
You might be asking yourself reading this title for this project being "Alien Space" its just a random name I came up with for this personal fun project. Then "realflow" is just the plugin I am using to create the water simulation in the animation.


You can use any render engine you like I just prefer to use Octane Renderer cause it works with CUDA from Nvidia. Realflow is just water simulation. All you care for Realflow doing is creating a fluid mesh at most its not hard to get started with. All you need is the simple ingredients.
-
Fluid Emitter
-
Mesher
-
Collider Tag
-
Demon
So the first step is really simple that you gotta think where is the water going to start from? That's your Emitter. Then it won't render if you don't have it rendered as a mesh so you apply a mesher. Your water or fluid won't have any collision with your sene so anything that you want Realflow to collide with you just apply a simple tag of that to the object in the Objects panel. You can choose to not use a Demon but you may want to add a simple element of wind, gravity or vortex so that's what Realflow's Demon is about and does.
After Effects is optional, I am just using it to have some post finishing effects, and to make it into one single mp4 instead of individual frames in a sequence.
Logo
I am going to start by making this project with my logo. You can make this be any logo you may want this to be. For this example I have just using my logo.

Some Material Selection
Next is your pick for material selection. Typically this is going to come down to your render engine of your choice. I am going to show a few examples but not all of them really. Just going to give an idea.
learn more about materials with Octane here.


Learn even better advanced Materials with Octane
Lighting
Lighting is everything when it comes to rendering. I have a whole folder of HDRI's for the work I do. I personally don't want much to deal with much warm lighting more like a bright type of lighting that looks realistic. This is all fantasy and abstract of course.
So Octane has a simple toggle for adding an HDRI Environment, Just think of a 360 Sphere for emitting light.

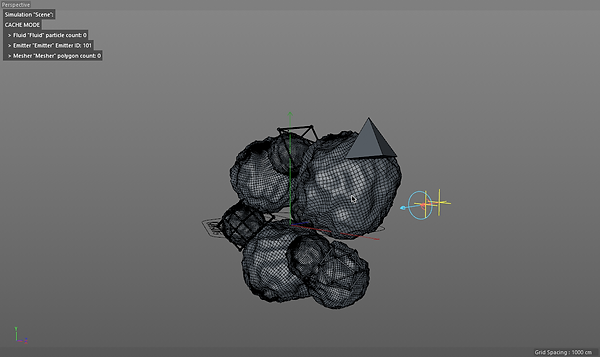
Caching
Using Cache is definity the way to speed up your viewport performance. Cache from Realflow is mainly just used for your viewport so you can have some idea for what's in your project really. Cache allows you to scrub in your timeline without how to rely on the dynamic simulation to break when not playing from frame zero.
It's also good when your a designer to defanty have lots of different drives. I personally can't not do design work not having more than 4 Terabytes worth or more on hand. It's also great if you don't already have a M.2 drive on your motherboard its great to have as what I like to call as as "Cache Drive" my main drive is just a 250gb sata 6GB speed drive its not a terrible choice but I should have chosen to have a larger drive in my desktop. I am still using a X99 system but it still does the job all pretty well as a whole. my cache drive m.2 is what I am using for my large 20 Gigabyte simulations that take a few minutes to execute. I do also have 2 separate 2 Terabyte drives that are both 7200 rpm drives there nice but can still have some latency when it comes to dealing with caching data. So there's a lot to consider when using Realflow.
When caching data your going to want to cache the fluid first and then next you can then cache the mesh to finish. Higher the quality the mesh the larger and longer it can be cache the data.
Collisions can also be accounted in your simulation so the more emitters and demons you add you can easily expect to see your cache to go up to 30 gb's or 50 gb's.
All of your Objects in your sene that you have will have a 1 mm "collision distance" from your objects think of it as a tiny aura
Rendering Techniques
When it comes down using Octane there isn't much to do when your working on your project its more used for the end result.
You can use Direct Lighting or Path Tracing mode.
Direct lighting is limited in how the different types of materials are rendered. If you don't care about.
-
Refraction (Water like, See through)
-
Sub-Surface Scattering
-
Film Index (Think Diamond)
If you want Film Index and Refraction then you will want to look at this next rendering mode.
Path Tracing is a more advanced rendering technique that does use more compute power from your Nvidia GPU.
PMC is referencing (Population Monte Carlo), PMC is very similar to Path Tracing but without so called "overhead" such as if you're wanting to get each frame that you export being very clean, without spending 2,500+ samples per frame.
PMC worlds slower than PT (Path Tracing) do to the fact Octane is
-
Sampling
-
Analyzing
-
Adapting
-
Resampling
-
Denoising
Where it can come in handy is scenes that have lots of variation, with different lighting, shadows, caustics and more. Path Tracing to achieve the same results on PMC is going to require lots of samples compared to PMC. The more branching (decision making) that the GPU does the slower it is. The advantage with PMC is that even though you are getting fewer samples per second, the noise will clear faster in certain cases. It can help with interior scenes or like riggles said with caustics. PMC is more ideal for animated movies.
Direct Lighting

Path Tracing


Adding Elements
To start with I like using Cinema 4D's Landscape object and enabling spherial mode. I ended up cloning is few times, then spawning the Realflow fluid from behind, making it so that the fluid comes through the back and goes forward toward the camera by being in the front.
After Effects
With After Effects all I want to do is take all 390 frames I exported from Cinema 4D and build it into an MP4 Video for Youtube.
Here you can see the transparency grid.

Adding a starry background.

Adding CC Lens, Deep Glow and Red Giant Magic Bullet Looks.

Final Creation
This is the finish video with the After Effects post polishing. With Direct Lighting Rendering mode from exporting from Octane the Exportings took 1 Hour and 20 mins where as the Path Tracing Rendering mode took over 11 Hours to finish exporting from Cinema 4D on a Single GTX 980 Nvidia GPU.